Setting Up Your Financial Independence Portal: Step-by-Step Guide for New Users
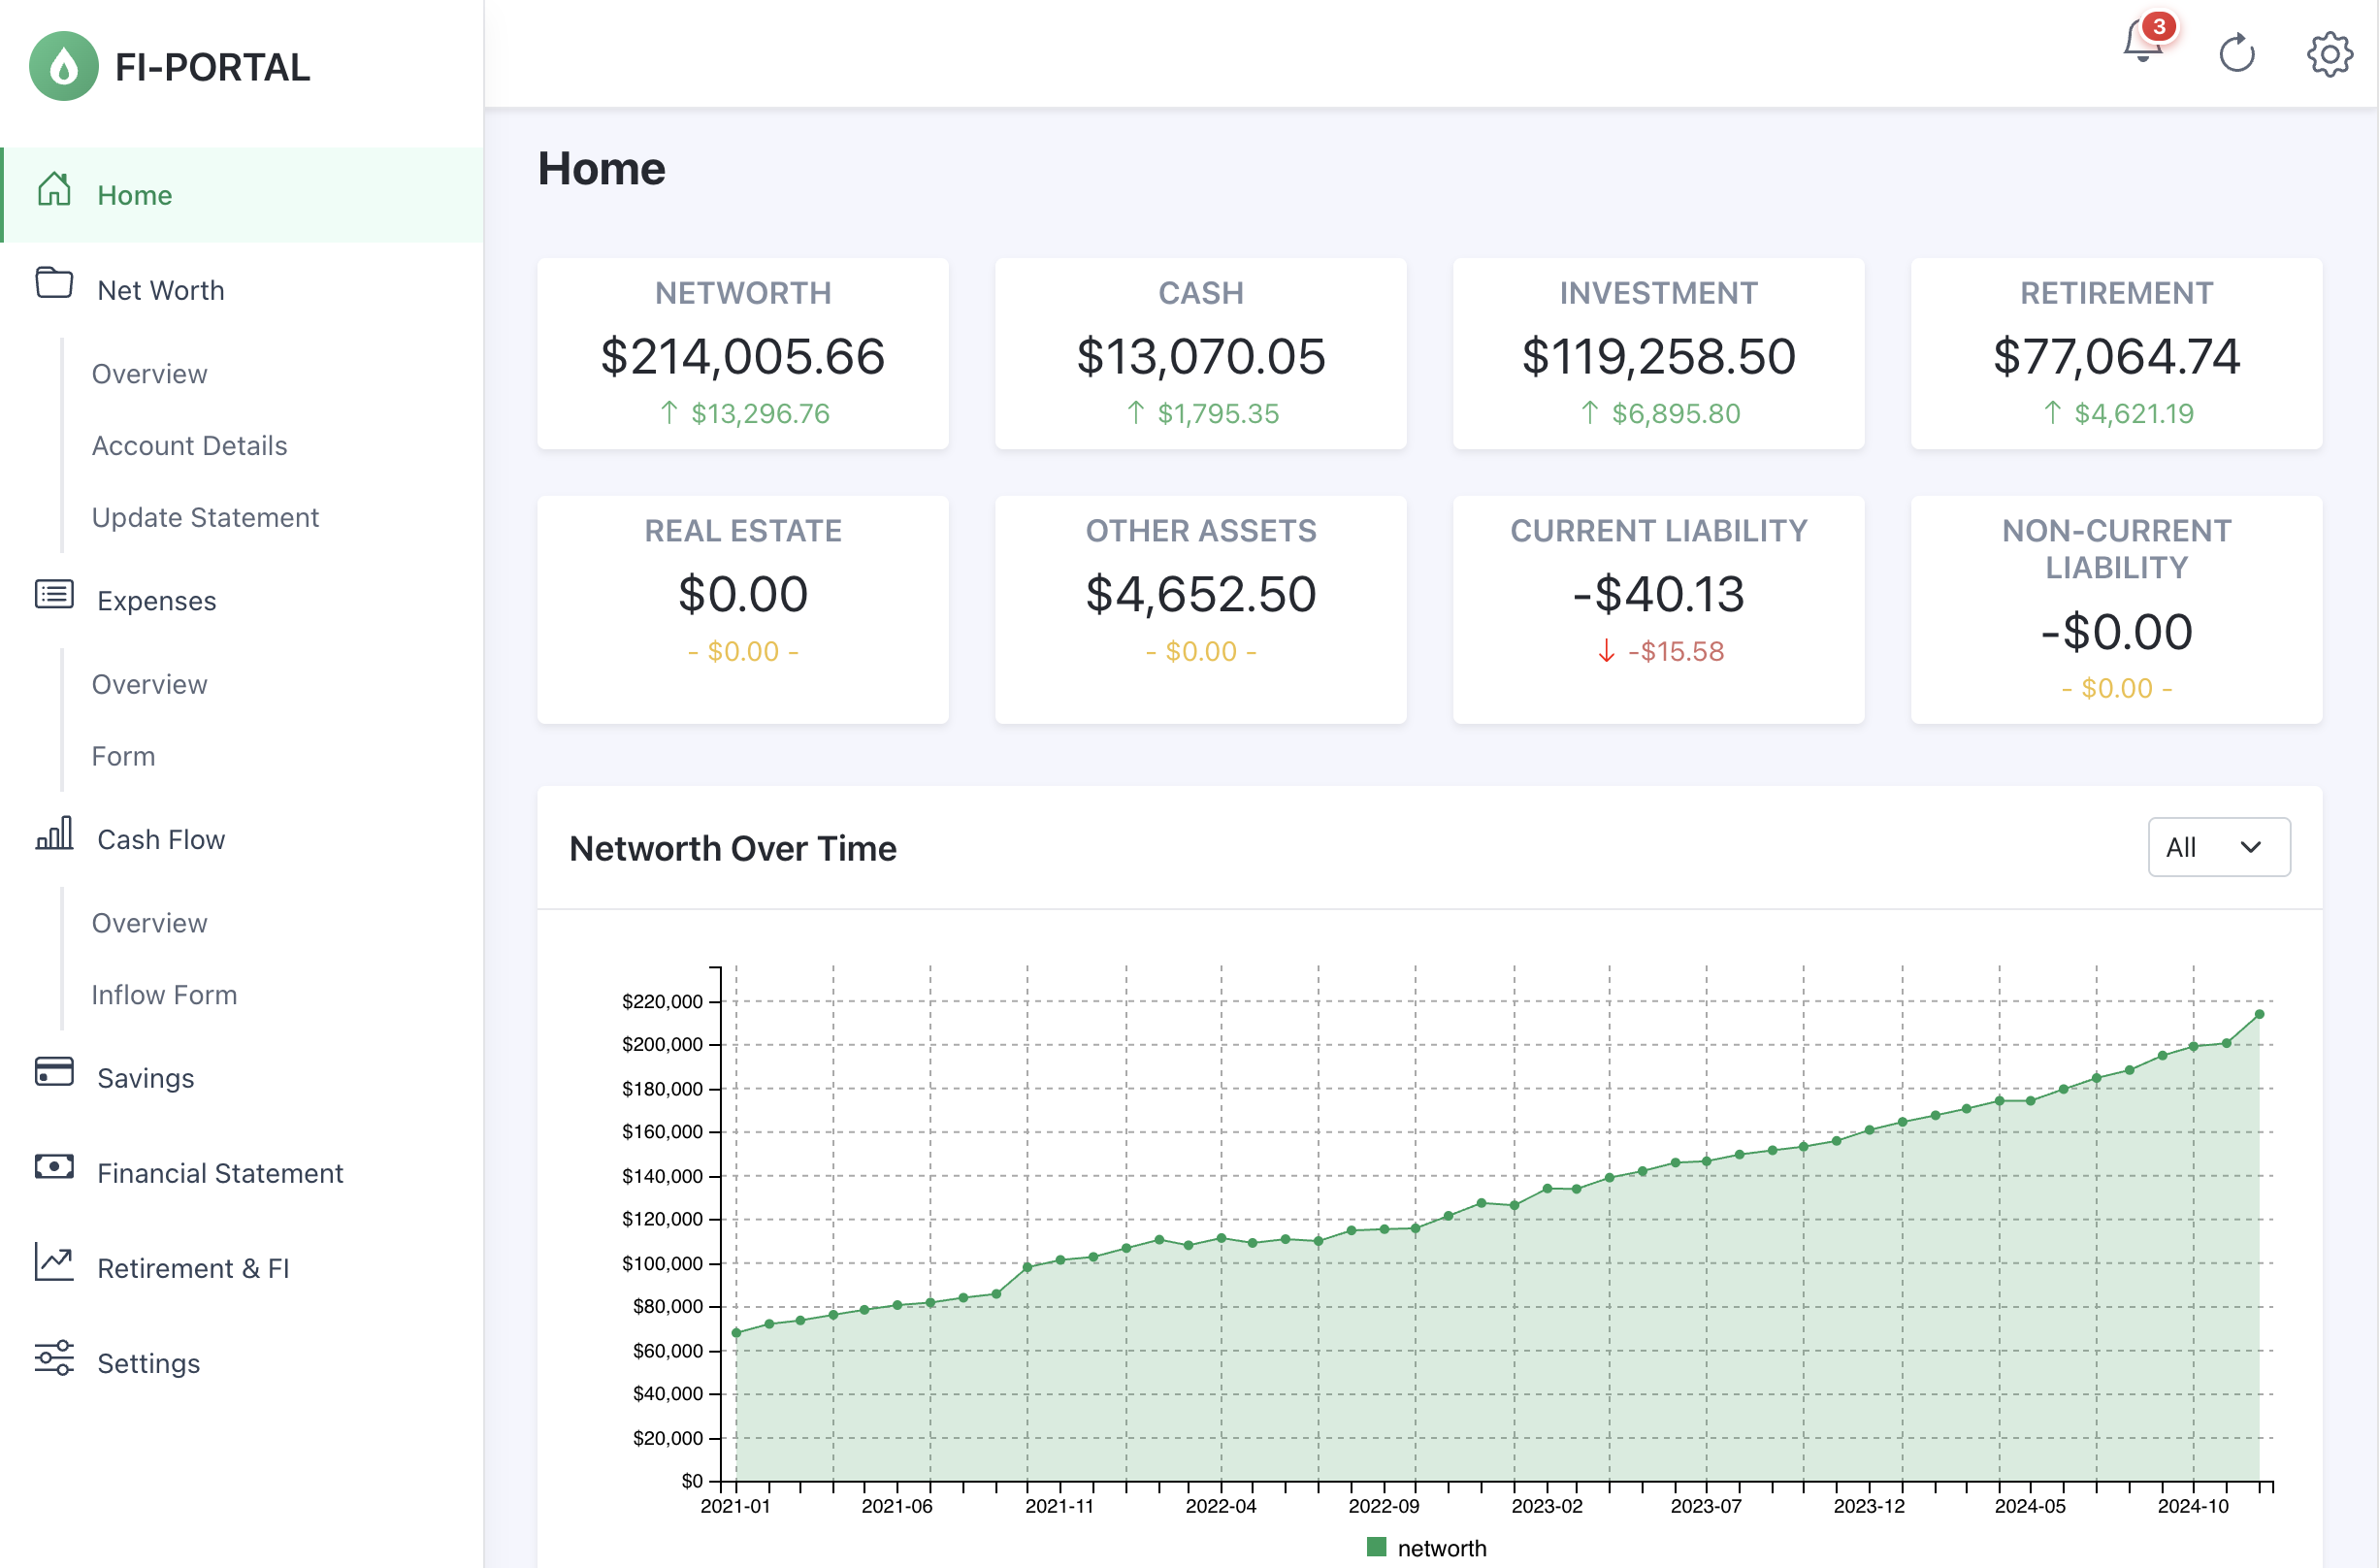
Tracking your journey to Financial Independence (FI / FIRE) requires absolute data privacy, reliable historical analytics, and an effortless monthly logging routine. Most proprietary financial apps require giving third-party services your bank credentials, charge recurring subscription fees, or lock your data behind closed ecosystems.
The Financial Independence (FI) Portal at thegosset.com/fi/ is built differently:
- 100% Private: Your financial data lives exclusively in your personal Google Spreadsheet.
- Zero Cost & Self-Hosted: Powered by free Google Apps Script endpoints and static web technologies.
- Instant 0ms Loads: Dual-state local caching loads your dashboard instantly from browser bookmarks without slow server redirects.
- Comprehensive Analytics: Net worth progression, savings rates, cashflow tracking, categorized expense analytics, and Monte Carlo retirement simulations with historical Robert Shiller S&P 500 / CPI datasets.
This tutorial guides you step-by-step through setting up your private backend and connecting your portal for the very first time.
Prerequisites
Before starting, ensure you have:
- A personal Google Account (to host your private Google Spreadsheet and Google Apps Script).
- A modern web browser (Chrome, Firefox, Safari, or Edge).
Step 1: Create Your Google Spreadsheet
Your spreadsheet acts as the single source of truth for all historical balances, cashflows, and budgets.
- Open your browser and navigate to sheet.new to create a new blank Google Spreadsheet.
- Name your spreadsheet something clear, such as "Personal FI Portal".
- Inspect your browser's address bar and copy the Spreadsheet ID from the URL:
https://docs.google.com/spreadsheets/d/<SPREADSHEET_ID>/edit
Save this ID in a temporary notepad—you will need it during configuration.
Step 2: Publish the Spreadsheet to the Web
To allow the browser client to fetch read-only balance and cashflow data with lightning speed, Google Sheets provides built-in CSV export endpoints. Publishing the spreadsheet to the web activates CORS-compliant access for these endpoints without requiring complex OAuth logins.
In your Google Spreadsheet menu, click File → Share → Publish to web.
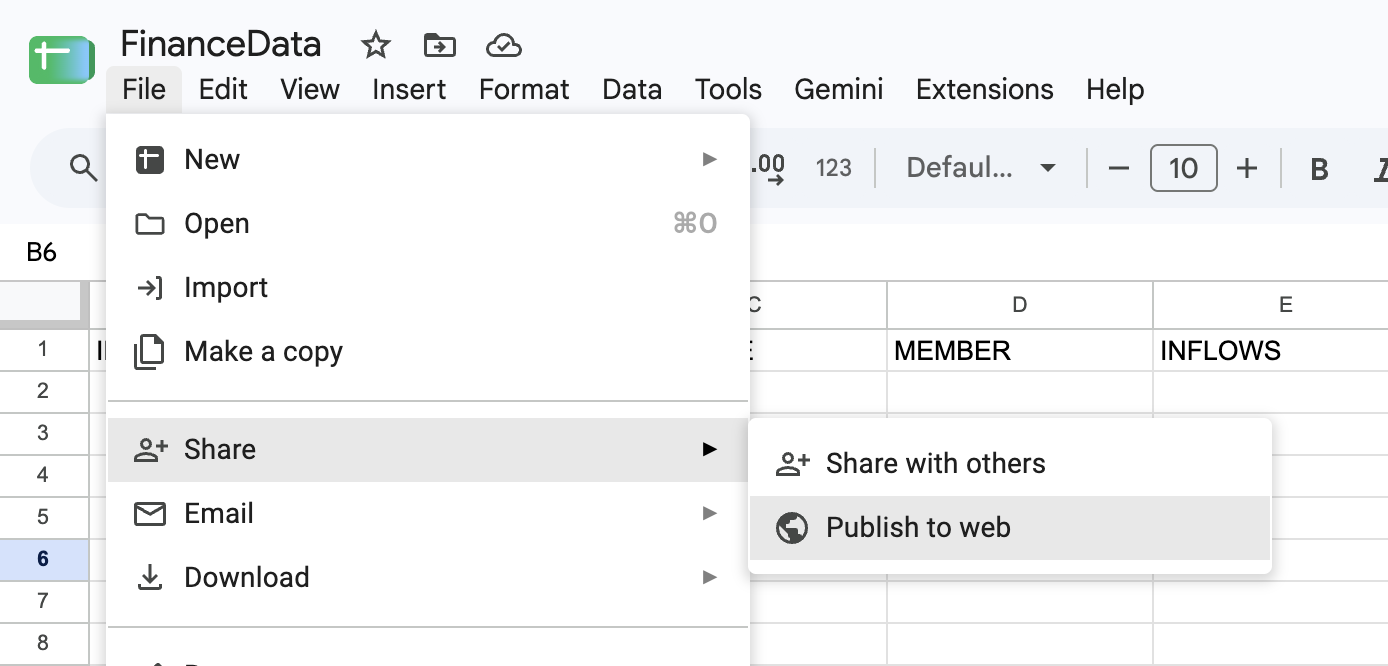
In the dialog, under Link, ensure Entire Document is selected and format is set to Web page.
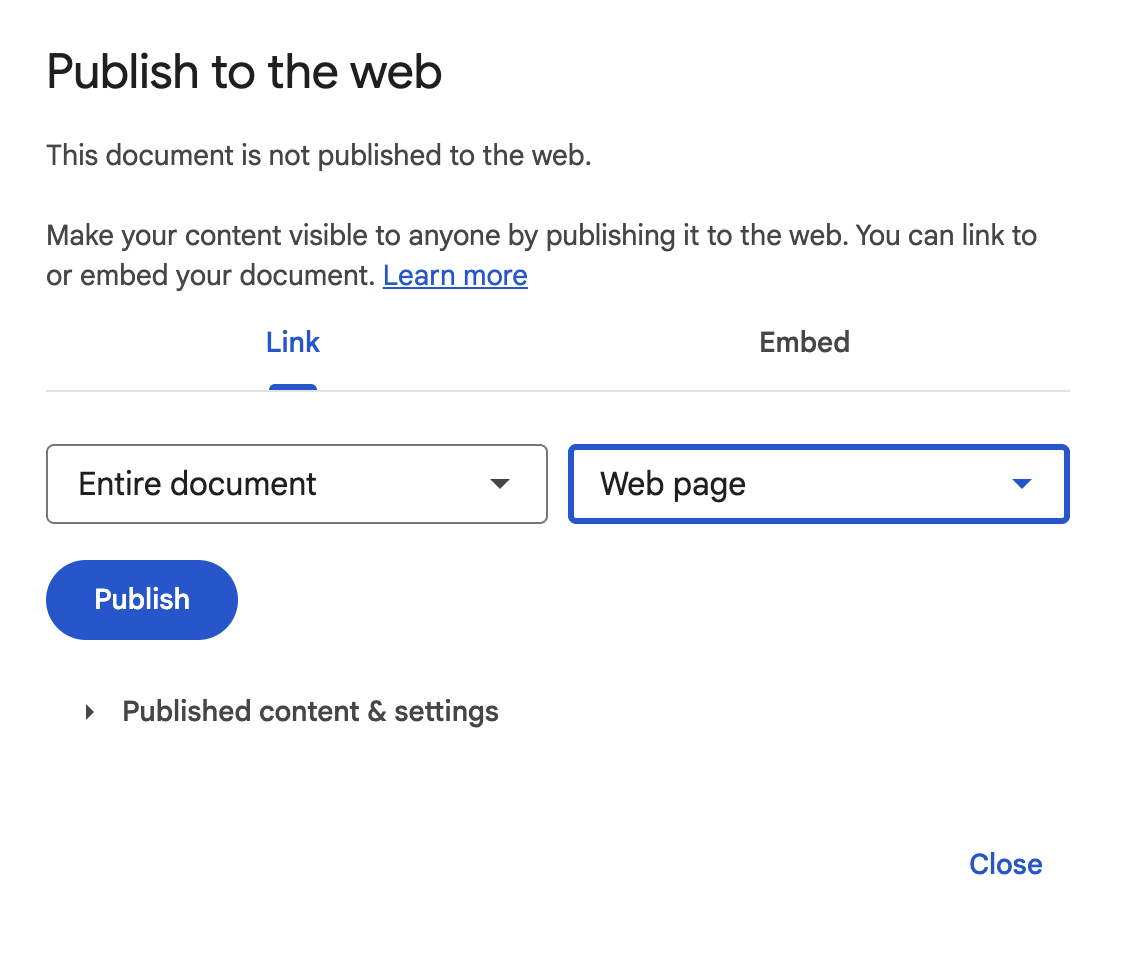
Click the green Publish button and confirm when prompted by Google.
Close the share dialog.
Why is this necessary?
The portal frontend fetches read-only CSV data directly from Google's high-speed/export?format=csvendpoints. Publishing the document permits your browser client to read the public sheet structure while transactional writes remain locked behind your authenticated Apps Script backend.
Step 3: Install the Google Apps Script Backend
Google Apps Script acts as the serverless API that handles atomic statement writes, column formatting, and metadata synchronization.
- In your spreadsheet, open Extensions → Apps Script.
- Delete any boilerplate code (such as
function myFunction() {}) currently in the script editor. - Open the latest
code.gsfile from the portal repository (or copy it from the portal setup page). - Paste the entire contents of
code.gsinto the Apps Script editor. - Save the file by pressing Ctrl+S (Windows) or Cmd+S (Mac).
Step 4: Deploy the Script as a Web App
Deploying the script turns your Apps Script into a secure REST endpoint that your dashboard can communicate with.
In the upper-right corner of the Apps Script editor, click Deploy → New deployment.
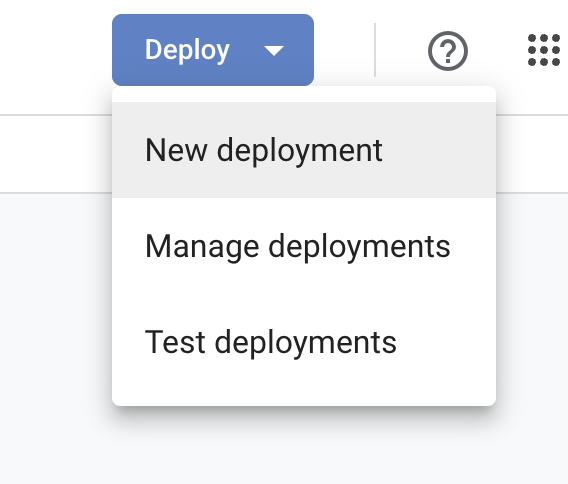
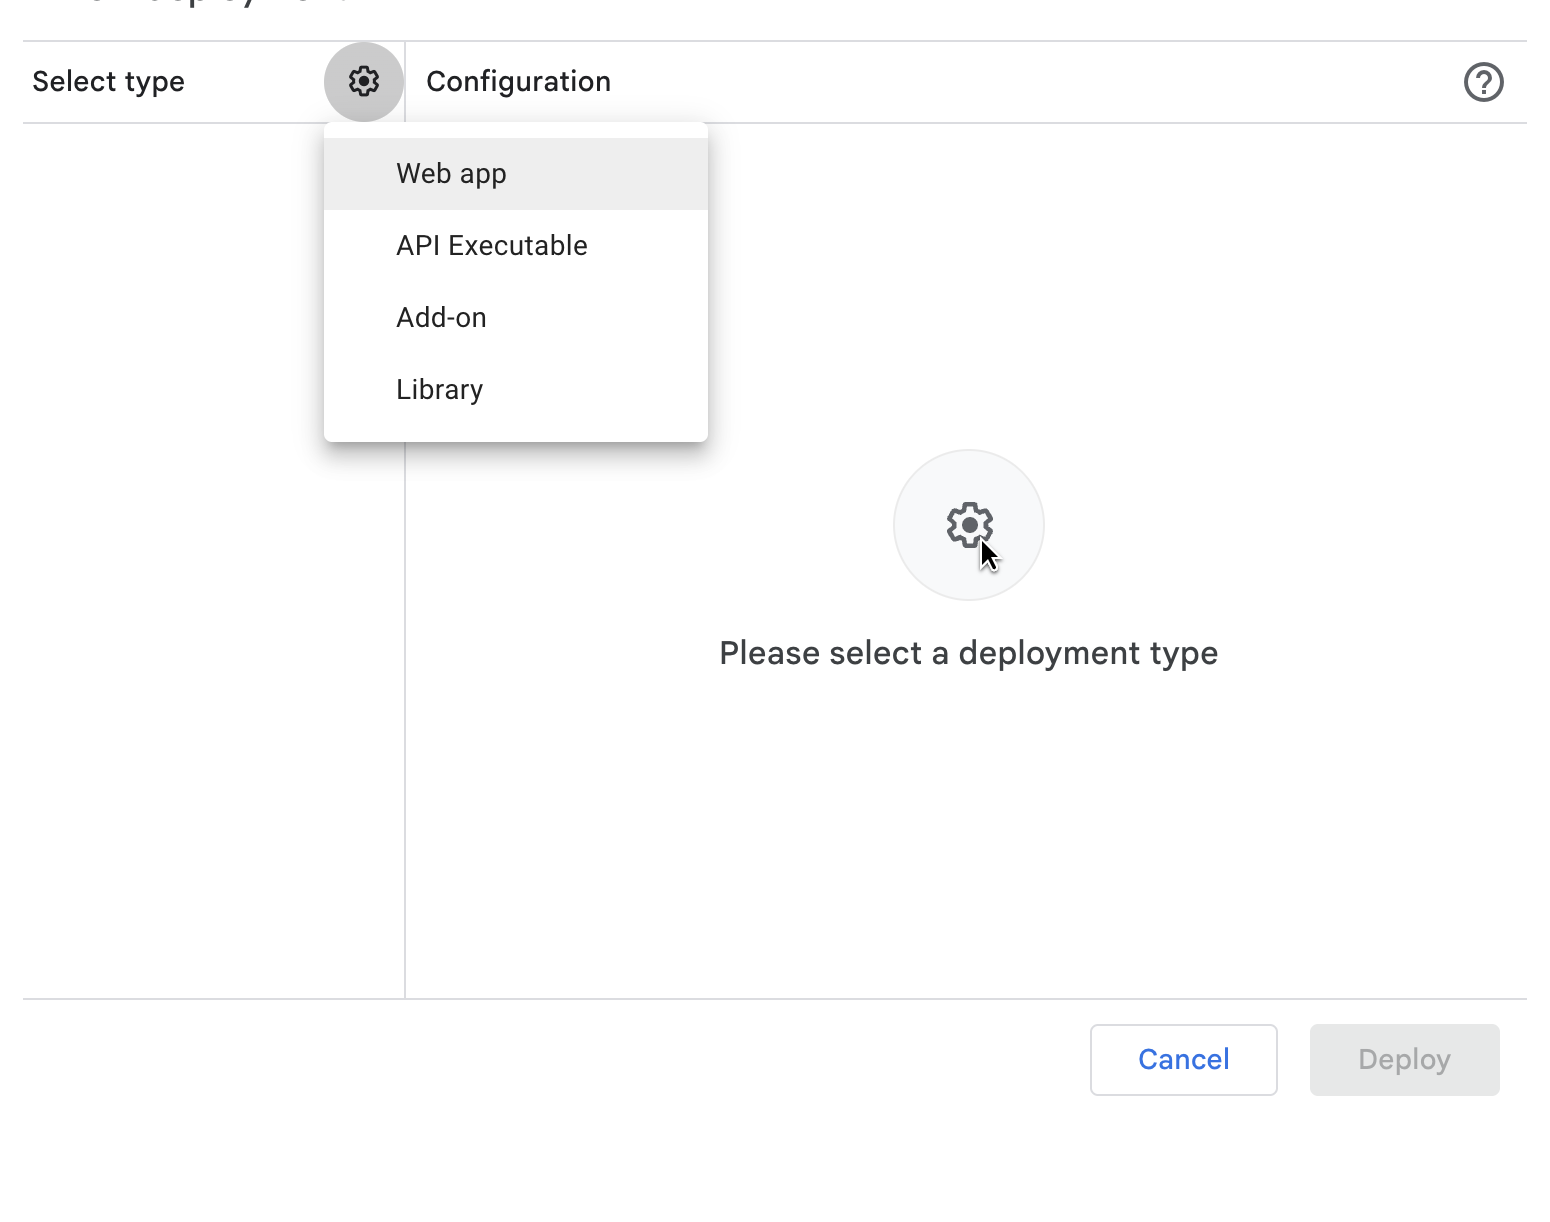
Click the gear icon (Select type) and select Web app.
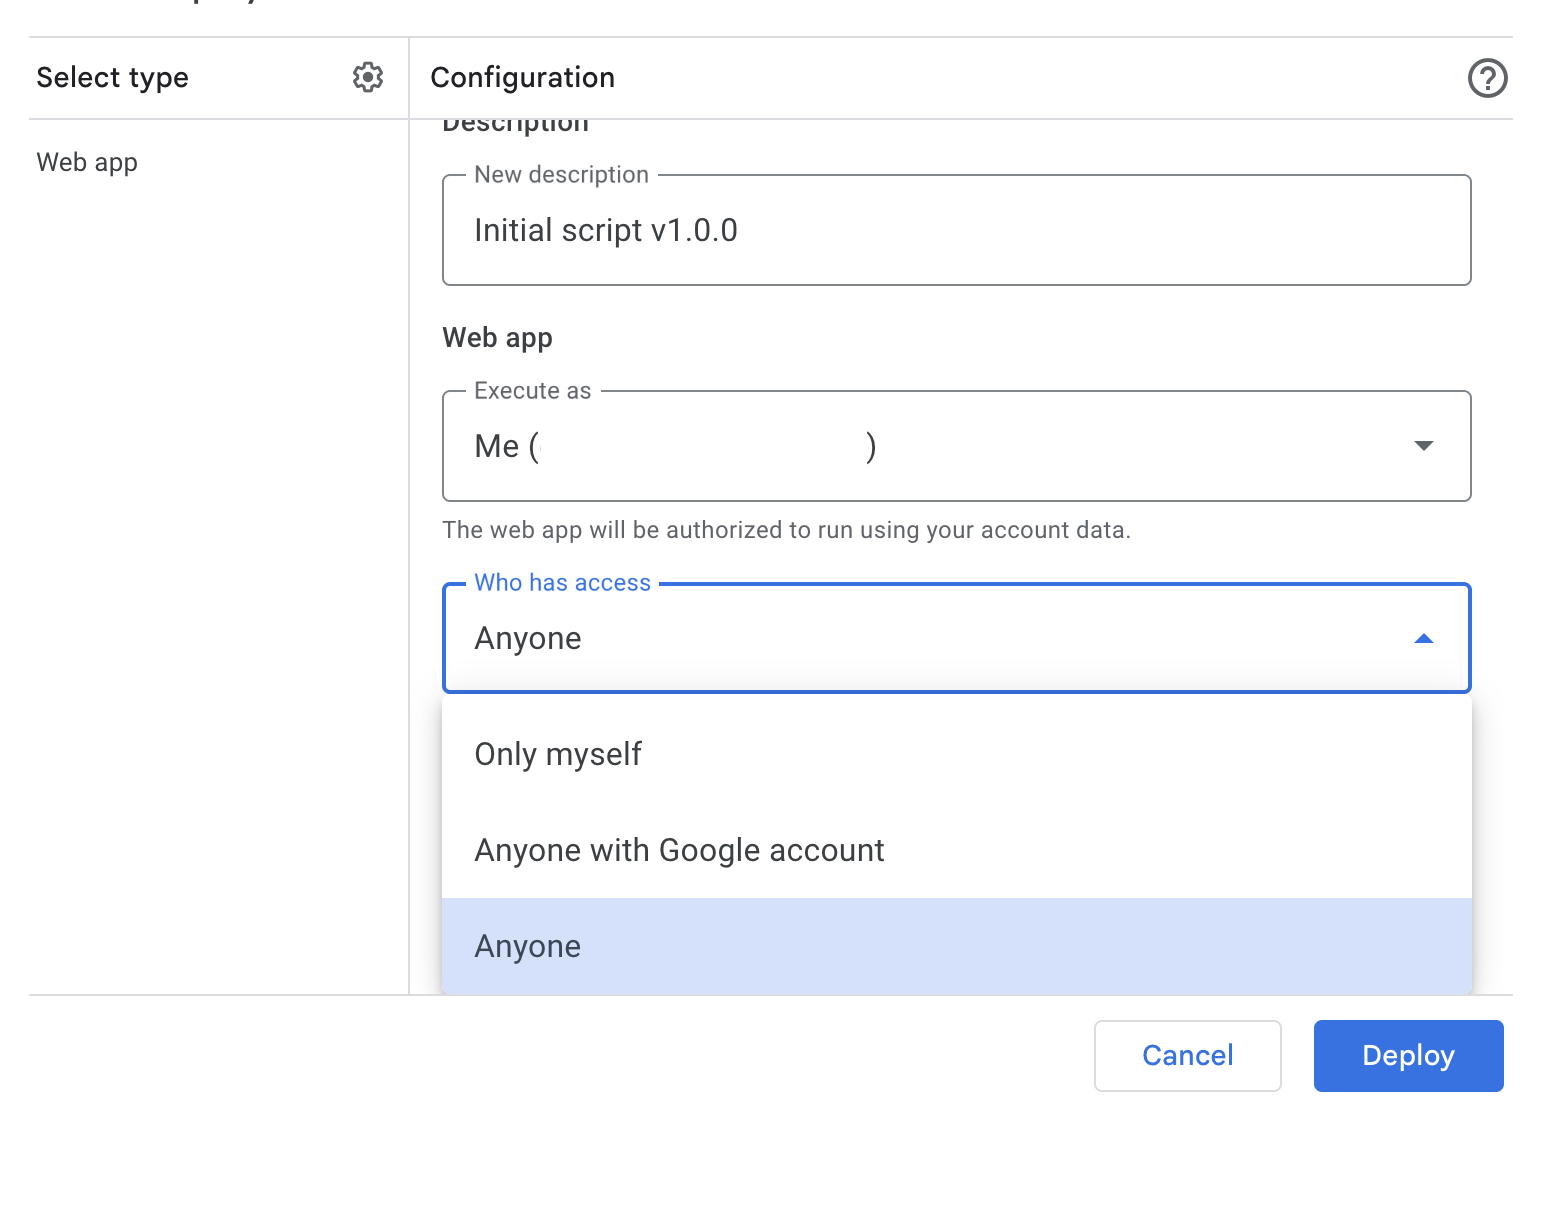
Configure the deployment settings:
- Description:
FI Portal Backend v1.0 - Execute as: Me (your_email@gmail.com)
- Who has access: Anyone
- Description:
Click Deploy.
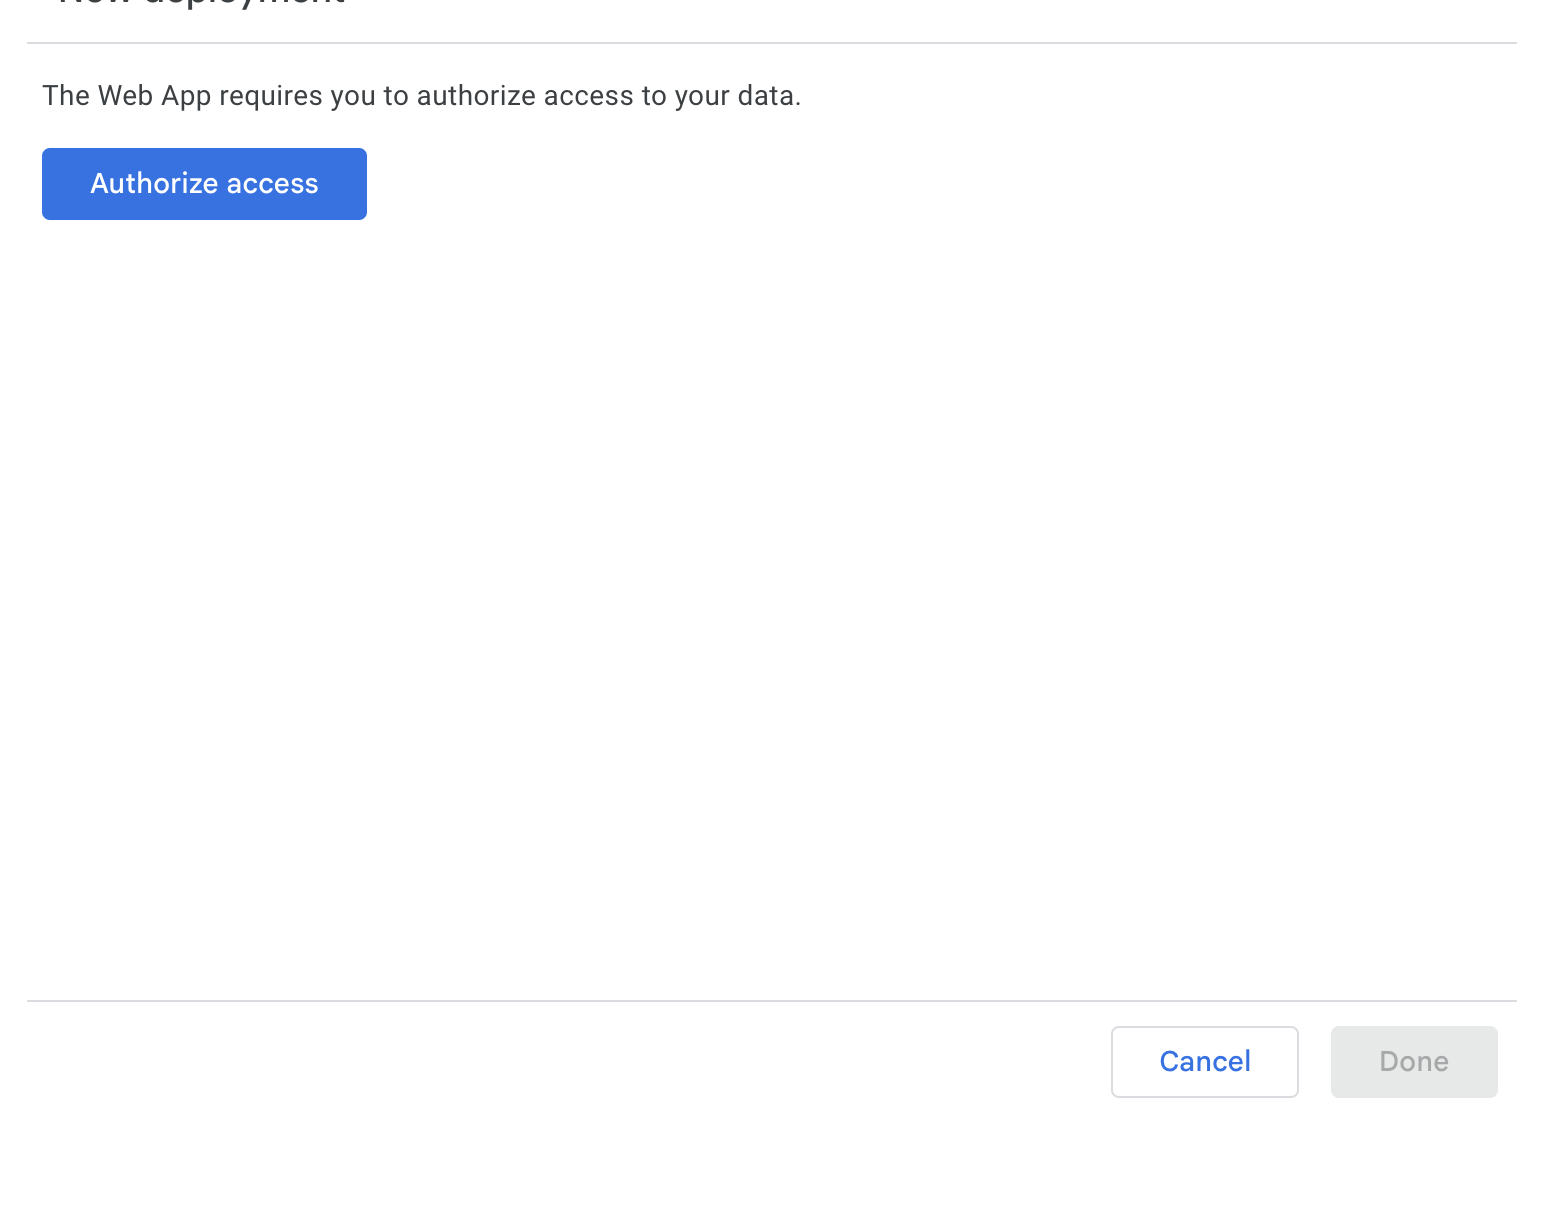
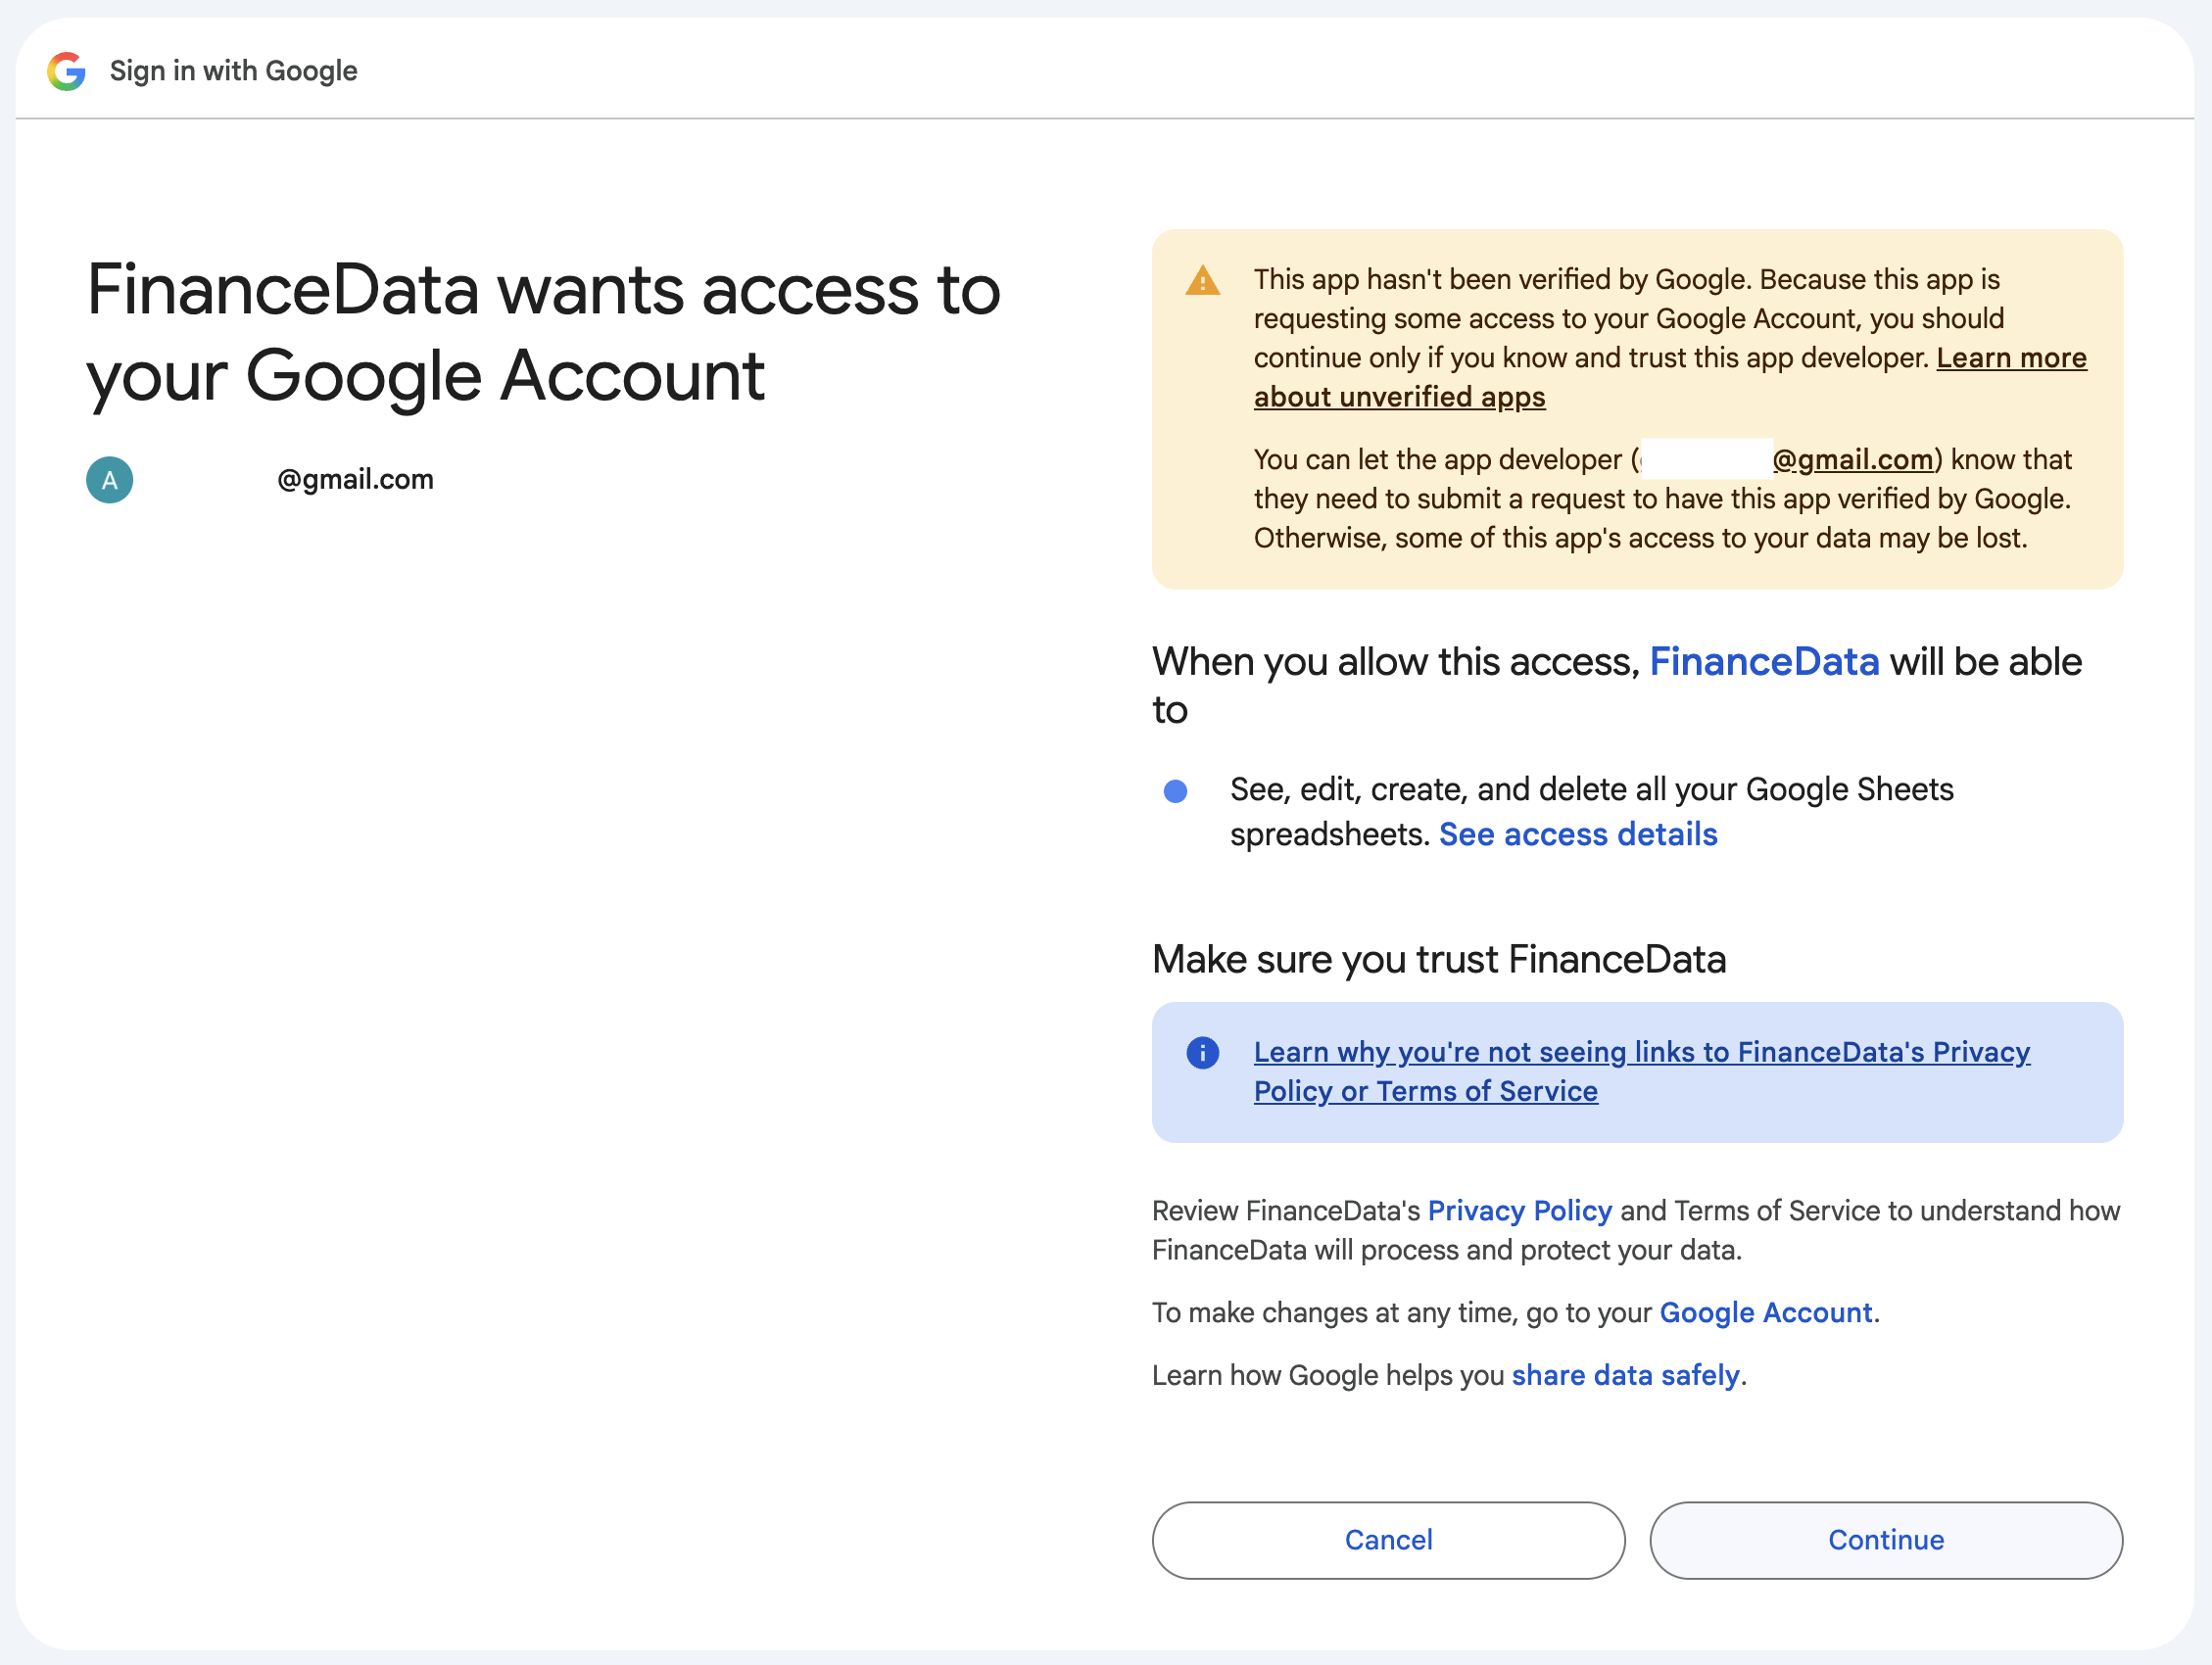
When prompted, click Authorize access.
Select your Google account.
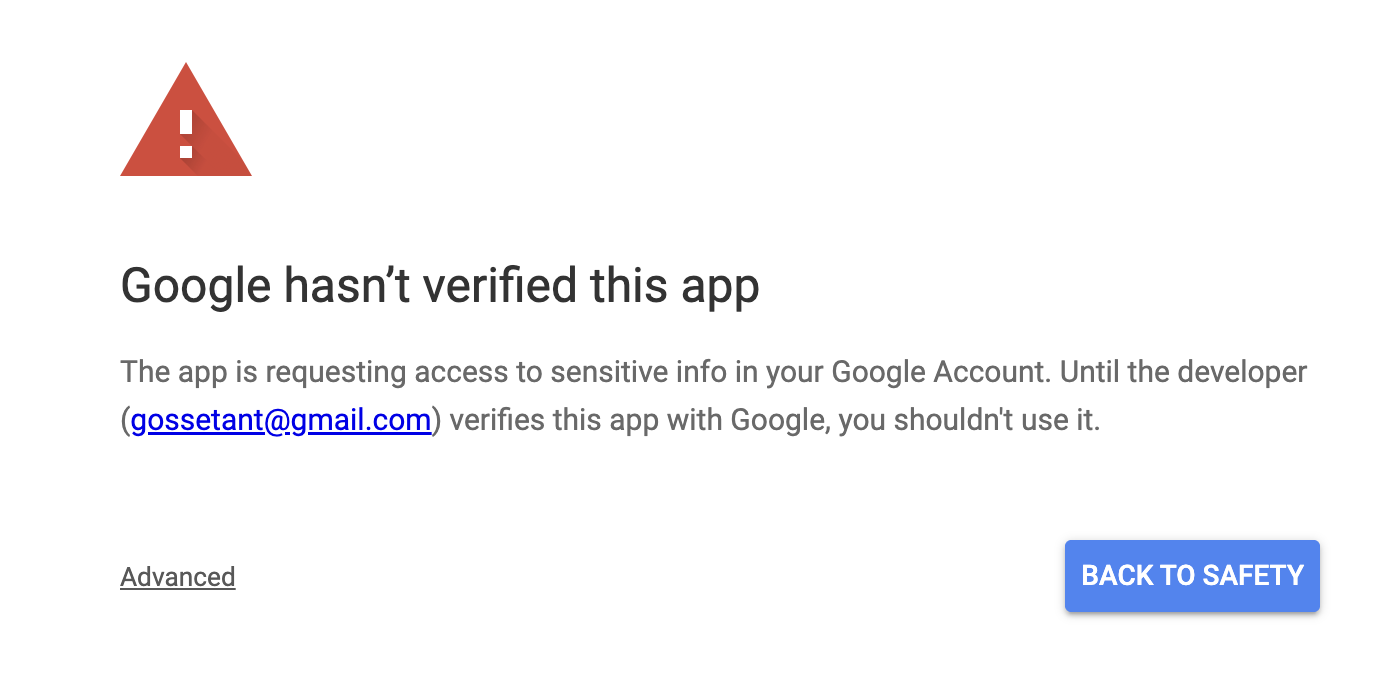
Click Advanced → Go to project (unsafe).
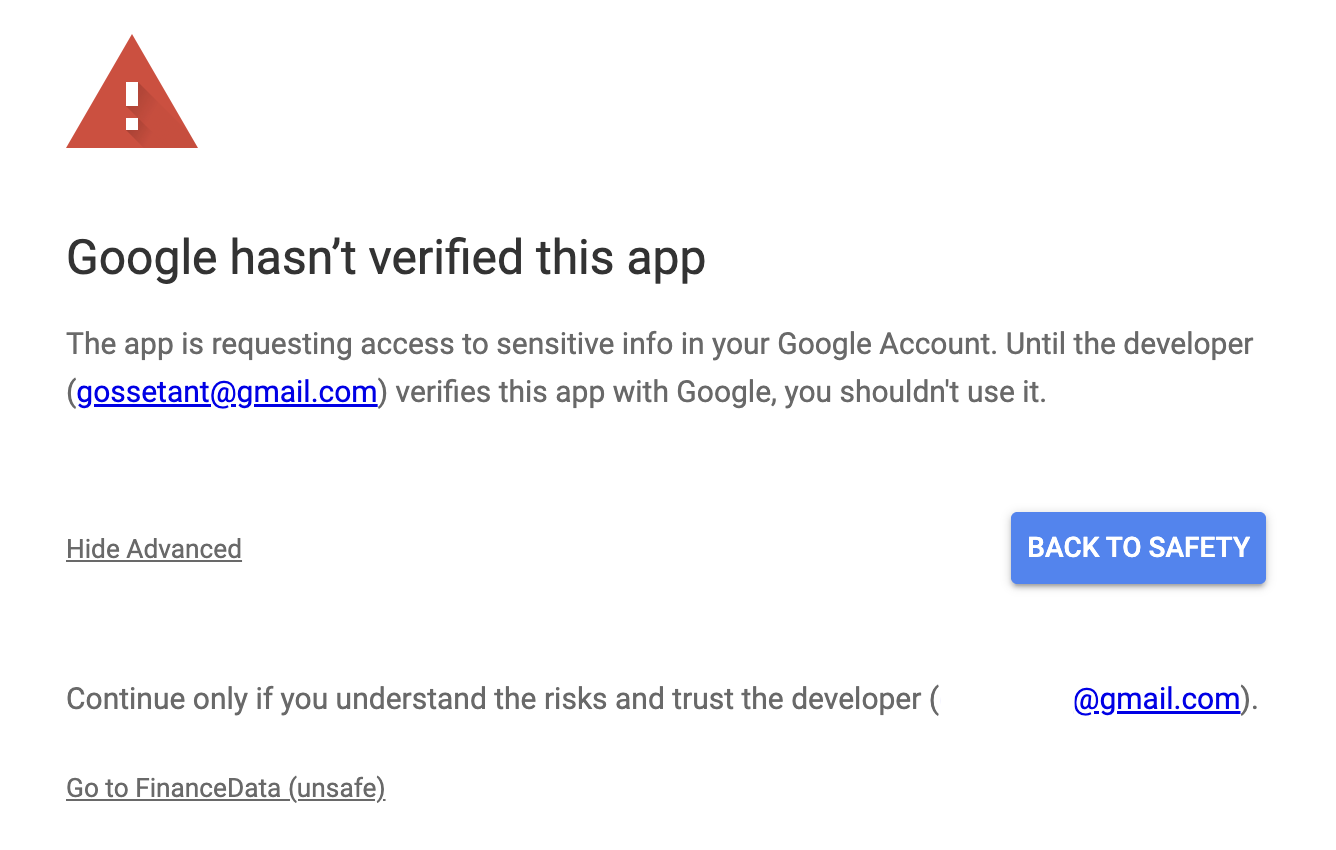
Grant the required spreadsheet permissions by clicking Allow.
Under Web app, click the Copy button to copy your Web app URL:
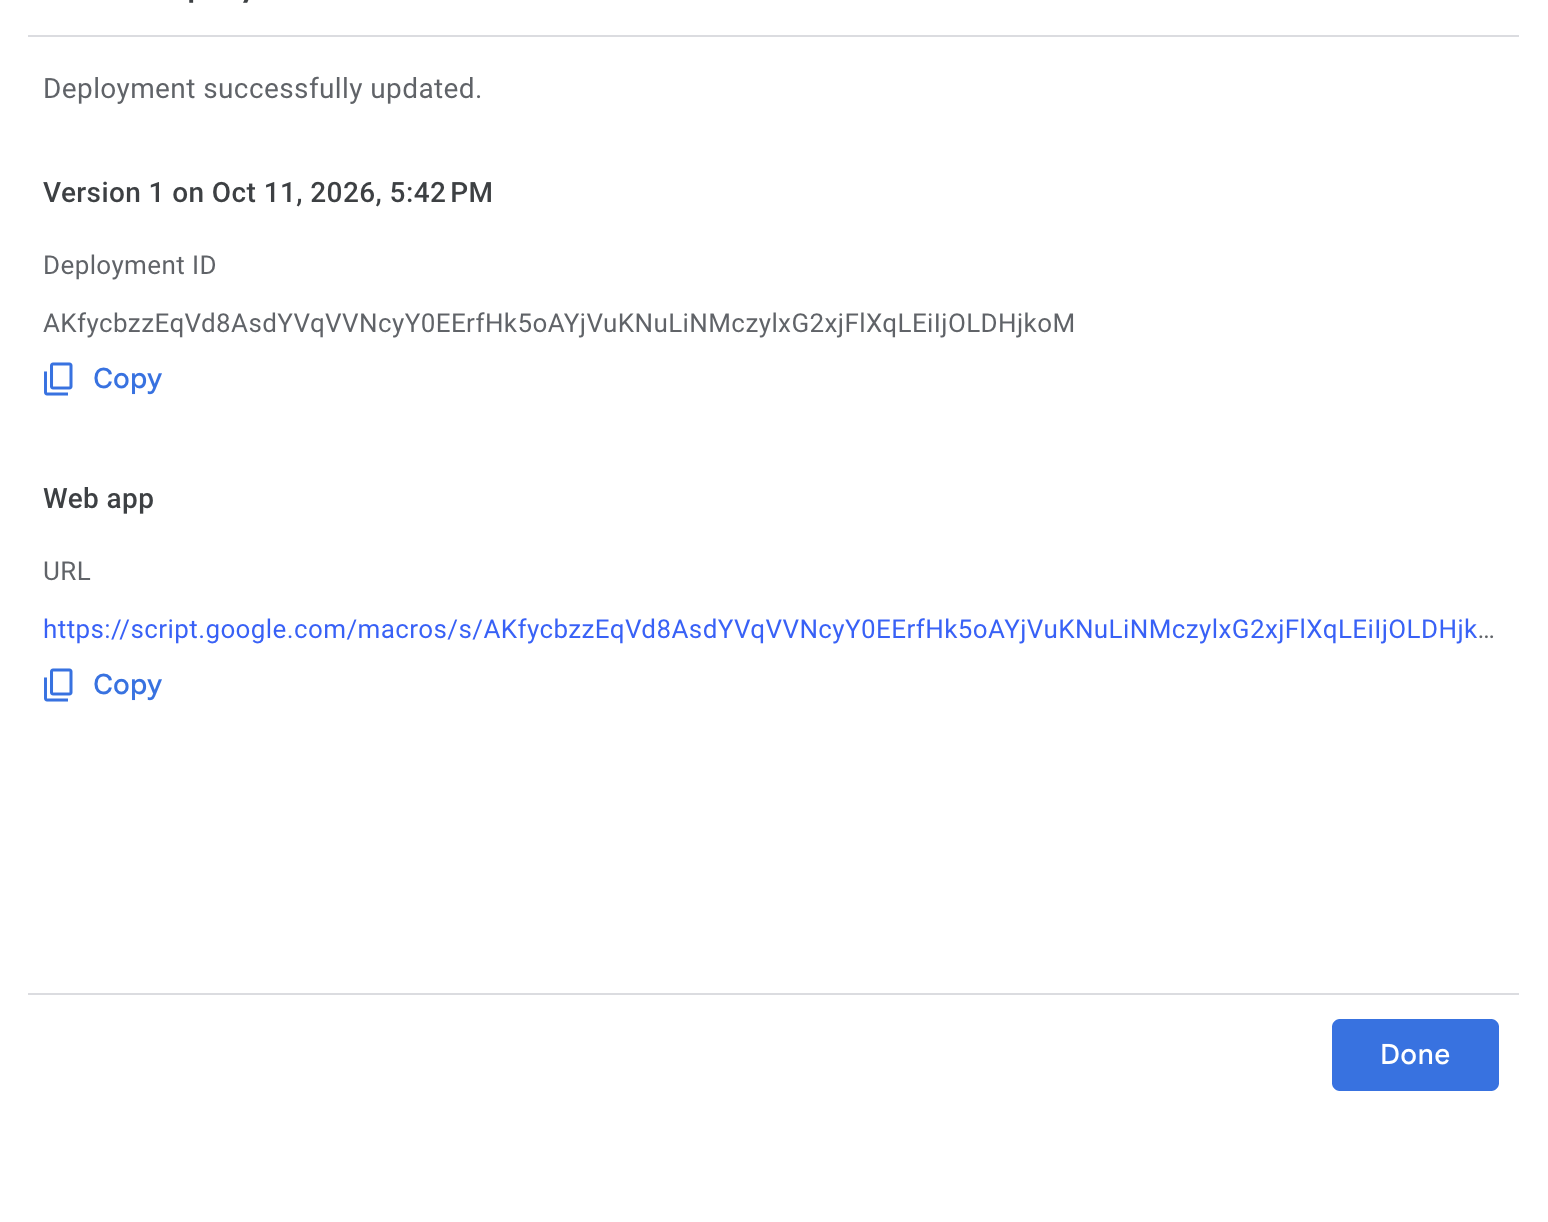
Security Note: Selecting "Who has access: Anyone" does not expose your data publicly. The endpoint requires knowing your unique deployment ID and operates exclusively within the parameters enforced by your script.
Step 5: Configure WEB_APP_URL and Run setup()
- In the Apps Script code editor, locate
const WEB_APP_URLnear line 33:
const WEB_APP_URL = "https://script.google.com/macros/s/AKfycb.../exec";
Paste the Web App URL you just copied between the quotes.
- Save the script (Cmd+S / Ctrl+S).
- In the toolbar function dropdown at the top, select the
setupfunction. - Click Run.
- Once execution finishes, inspect the Execution log at the bottom of the editor window. You will see a pre-formatted setup link:
🔗 PRE-POPULATED CONNECTION LINK (Open to verify & connect):
http://localhost:8000/fi/connection.html?sid=...&asid=...
- Copy this URL and open it in your browser. (If using the live site, replace the host with
https://thegosset.com/fi/connection.html?sid=...&asid=...).
Step 6: Complete the Interactive Onboarding Wizard
When you open the connection link, the portal verifies your credentials and launches the 5-Step Onboarding Wizard to configure your setup from a clean slate:
Step 1: Household Members
- Add the members of your household (e.g. Alex, Jordan).
- Members appear across all statement owner dropdowns, expense tracking, and cashflow splits.
Step 2: Income Streams
- Select personal and shared income sources (e.g. Salary - Alex, Rental Property, Dividends).
Step 3: Financial Accounts
- Add your accounts using the structured 3-part syntax:
Category - Institution - Owner
(e.g.Checking Account - Fidelity - Alex,401K - Vanguard - Alex,Credit Cards - Chase - Alex). - The input field maintains instant focus so you can add multiple accounts rapidly by pressing Enter.
Step 4: Expense Categories
- Select standard budget categories (Housing, Groceries, Healthcare, Transportation, etc.) or add custom categories tailored to your lifestyle.
Step 5: Review & Save to Spreadsheet
- Review your configured summary.
- Click Save to Spreadsheet.
- The script automatically provisions all 5 required tabs in your Google Sheet (
AccountData,InflowData,ExpenseData,SavingData,FormData) with standardized schemas.
Step 7: Connect to Portal & Bookmark Your Link
- After saving, click Connect to Portal.
- The system runs an automated pre-flight check, verifying that:
- Apps Script responds with
pongand reports versionv1.0.0+. - All spreadsheet tab GIDs are retrieved.
- The CSV endpoints are readable without permission errors.
- Apps Script responds with
- You will automatically be redirected to your live dashboard at a URL structured like:
index.html?sid=<SPREADSHEET_ID>&asid=<SCRIPT_ID>&acc_gid=<GID>&inf_gid=<GID>&exp_gid=<GID>&sav_gid=<GID>&fod_gid=<GID>#home
- Bookmark this URL immediately:
- Save this URL to your browser bookmarks bar.
- Visiting this bookmark in the future opens your live dashboard instantly with 0ms load time—bypassing
connection.htmlentirely!
Summary of the Spreadsheet Tabs
For reference, the wizard creates the following 5 sheets with exact headers:
| Tab Name | Headers | Description |
|---|---|---|
AccountData |
timestamp, date, account, value |
Historical monthly account balances |
InflowData |
timestamp, date, category, value, 401k, federal taxes, medicare taxes, social security taxes, state taxes, disability taxes, hsa, brokerage, deductions |
Monthly paychecks and income records |
ExpenseData |
timestamp, date, category, from, for, value, description |
Categorized spending records |
SavingData |
(Blank) | Savings and investment allocations |
FormData |
INFLOW, ACCOUNT, EXPENSE, MEMBER, INFLOWS, OUTFLOWS, INFLOW_FORM_HEADER |
Dynamic household settings and categories |
You are now ready to start your monthly financial check-in routine!